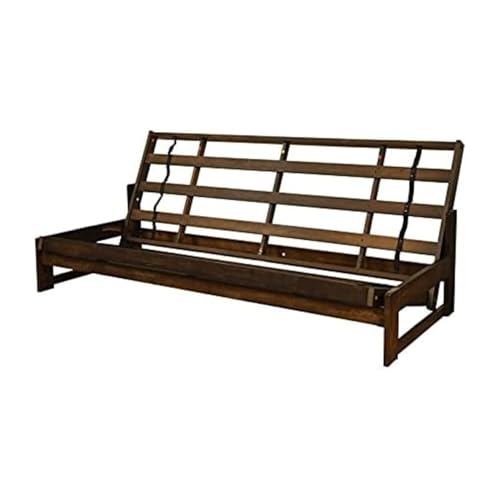
How to Repair Sofa Frame Issues: A Complete Guide
Diagnose and fix wobbly joints, cracked wood, broken dowels, and structural weaknesses. Save hundreds of dollars by restoring your sofa's frame to solid, squeak-free condition.
Why This Guide Matters: The frame is the skeleton of your sofa. When it fails, no amount of cushion fluffing or upholstery cleaning will fix the underlying problem. Ignoring frame issues leads to accelerated damage — a small loose joint today can become a complete structural failure tomorrow. This guide helps you accurately diagnose problems and decide whether a DIY repair is practical or if professional help is the smarter choice.
Table of Contents
- How to Identify Sofa Frame Problems
- Understanding Sofa Frame Construction
- Essential Tools and Materials for Frame Repair
- Step-by-Step Diagnosis: Finding the Root Cause
- How to Repair Loose Frame Joints
- How to Fix Cracked and Broken Frame Members
- Repairing Sagging or Broken Support Rails
- Reinforcement Techniques for Long-Lasting Strength
- Repair vs. Replace: How to Decide
- Prevention: Protecting Your Frame from Future Damage
- Frequently Asked Questions
How to Identify Sofa Frame Problems
Frame problems rarely announce themselves all at once. They develop gradually through small warning signs that most people overlook or dismiss as normal wear. Recognizing these symptoms early is the difference between a simple regluing job and a costly structural rebuild. If your sofa is also experiencing cushion issues alongside frame problems, our guide on how to fix sagging sofa cushions can help you address both issues comprehensively.
Creaking or Popping Sounds
Noise when sitting or shifting weight usually means joints are moving slightly under load — a clear sign of dried glue or loose connections.
Wobbling or Rocking Motion
The sofa rocks side-to-side or front-to-back when weight is applied. This often relates to loose joints but can also indicate wobbly or uneven legs.
Uneven Seat Height
One side of the sofa sits lower than the other, even after adjusting cushions. This indicates a structural failure in the frame or support system beneath.
Sagging That Does Not Improve
When seat sagging persists even after replacing worn springs, the frame rail supporting the spring system has likely failed.
Gaps or Separation at Joints
Visible gaps between frame members at corners or arm connections where pieces should be flush. You may see these at the base of arms or under the seat.
Feeling of Instability
A general sense that the sofa does not feel solid when you sit down — subtle shifting, flexing, or give that was not present when the sofa was new.
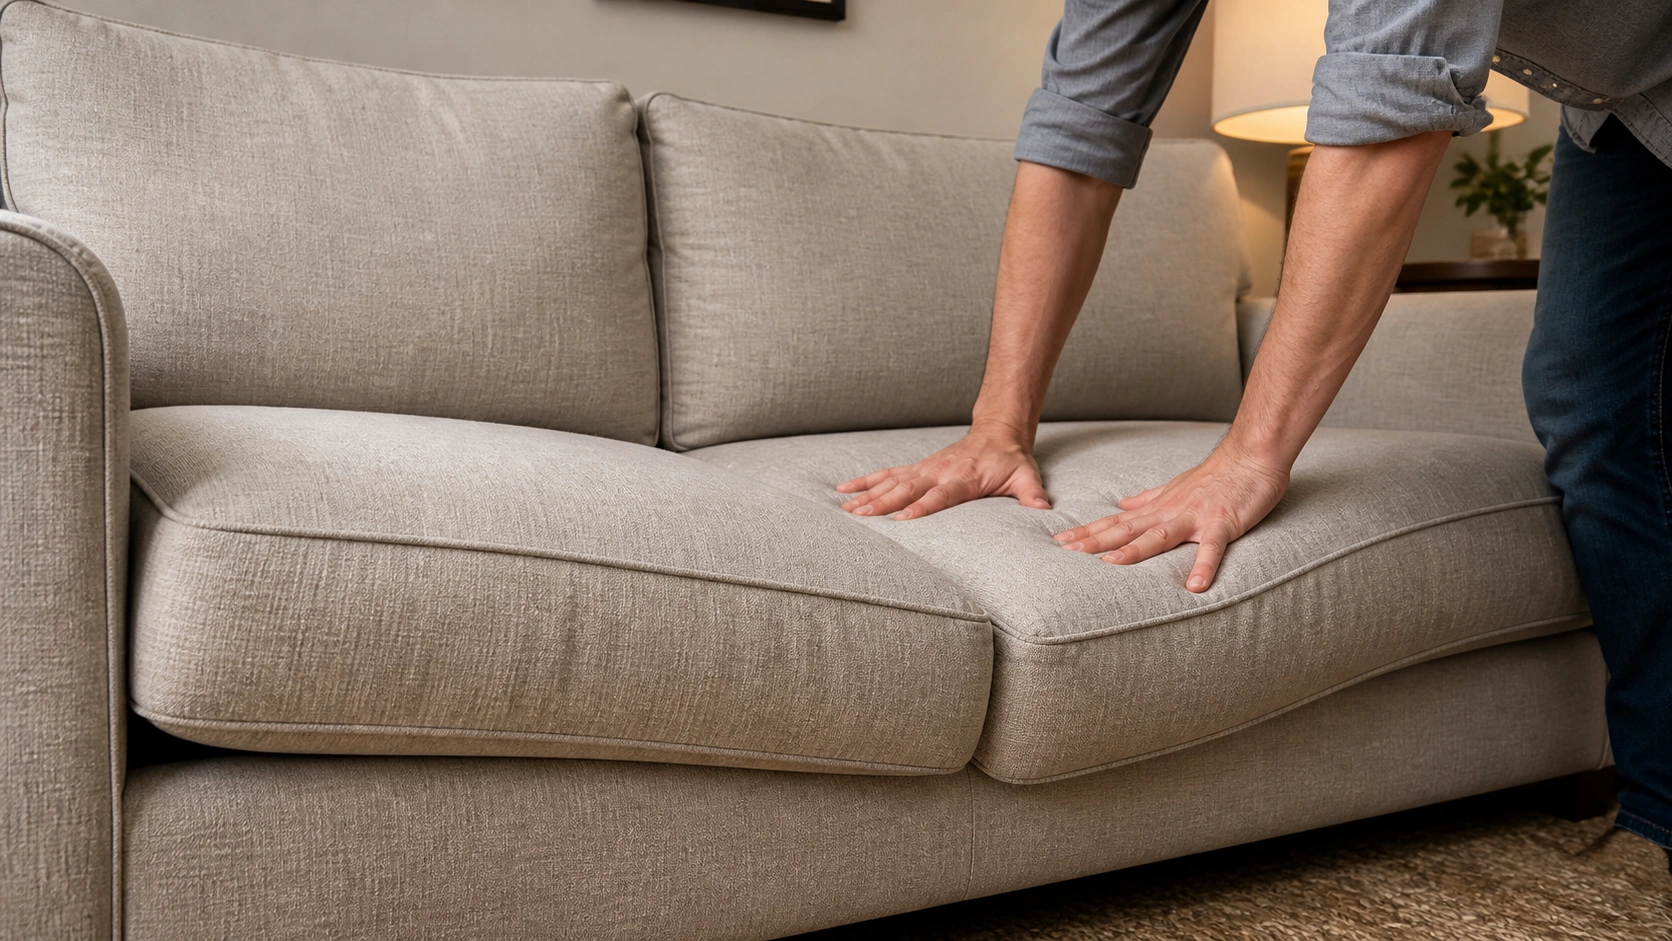
Testing for frame instability by applying firm downward pressure at different points on the sofa
Understanding Sofa Frame Construction
Before attempting any repair, you need to understand how your sofa frame is built. The frame materials used in construction directly determine both the likely failure points and the appropriate repair methods. A hardwood frame will fail differently — and respond to repair differently — than a plywood or particle board frame.
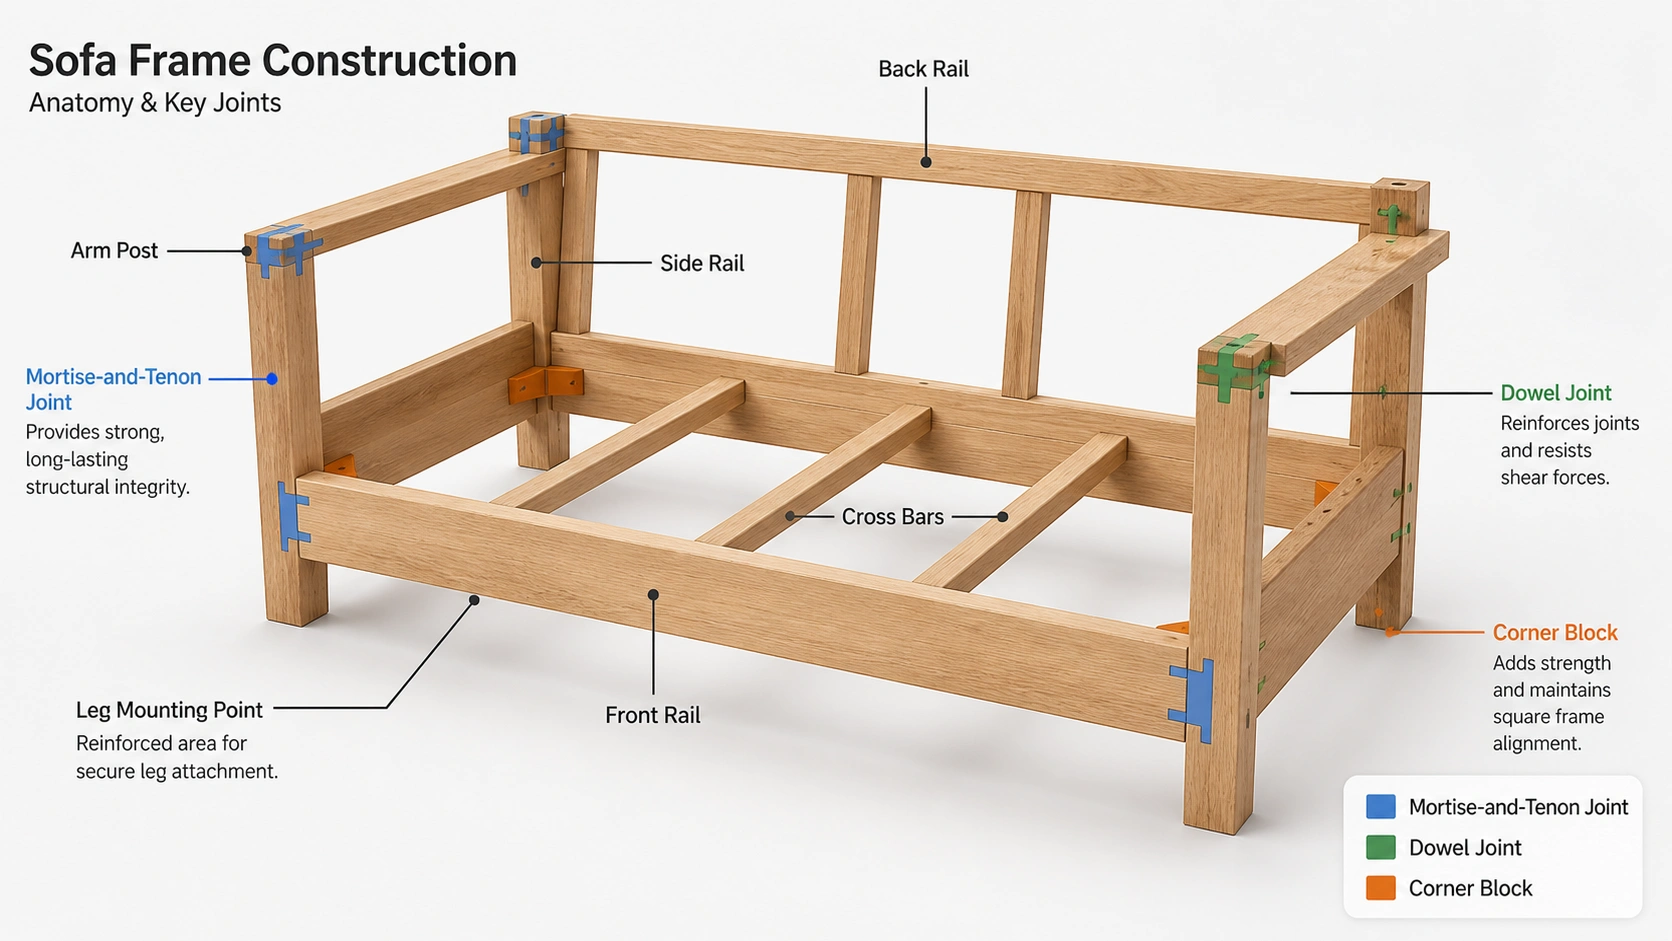
Key structural components of a typical sofa frame: rails, cross bars, arm posts, and leg mounting points
The main horizontal members — the front rail, back rail, and side rails — form the perimeter that supports the seat. Cross bars or stretcher rails connect the side rails and prevent the frame from racking (parallelogram distortion) under weight. Arm posts rise vertically from the frame to support the armrests, and leg blocks provide mounting points for the legs. In a sectional sofa, additional internal bracing connects the modular sections.
Joints are where frame failures concentrate. Most quality sofas use one of these joint types:
Mortise and tenon joints are the strongest traditional method — a protruding tenon fits into a carved mortise hole, often secured with a wooden dowel through both pieces. Dowel joints use cylindrical wooden pegs glued into aligned holes. Corner blocks are triangular wooden pieces screwed into the inside corners where rails meet, adding significant reinforcement. Biscuit or plate joinery uses compressed wood biscuits or metal plates inserted into matching slots.
Frame Material Matters: Kiln-dried hardwood (oak, maple, ash, beech) is the gold standard — it is dense, strong, and resists warping. Plywood frames can be adequate if they use multiple layers and proper joinery. Particle board or MDF frames are the weakest and most difficult to repair effectively. Understanding your frame material type is the first step in determining whether repair is worthwhile.
Essential Tools and Materials for Frame Repair
Having the right tools before you start will save significant time and frustration. Most of these items are inexpensive and useful for other household projects as well. For replacement legs or leg hardware, you may want to browse sofa leg replacement options if the damage extends to the legs themselves.
Power Drill and Bits
For removing old screws, drilling pilot holes, and driving new screws. A cordless drill with Phillips and flathead bits is essential.
Wood Clamps (2–4)
Bar clamps or pipe clamps to hold joints tightly while glue dries. At least two clamps are needed; four is ideal for corner repairs.
Wood Glue
Quality PVA wood glue (Titebond II or III) for standard repairs. Waterproof polyurethane glue for outdoor frames. Epoxy for gap-filling.
Wood Dowels
Hardwood dowels in 3/8-inch and 1/2-inch diameters for replacing broken dowels or reinforcing weak joints.
Corner Braces and Plates
Metal L-brackets, mending plates, and flat corner braces for reinforcing repaired joints beyond what glue alone can achieve.
Measuring Tape and Square
For measuring replacement wood pieces accurately and verifying that repaired joints are at proper right angles.
Handsaw or Jigsaw
For cutting replacement wood pieces to size. A coping saw works for small cuts; a jigsaw is faster for larger pieces.
Staple Remover and Gun
For removing the dust cover and upholstery tacks/staples to access the frame, and reattaching them after repair.
Replacement Hardwood
Kiln-dried hardwood stock (oak, maple, or poplar) cut to match the dimensions of damaged frame members.
Safety Gear
Safety glasses, work gloves, and a dust mask. Wood dust, old staples, and sharp tools all pose injury risks during frame repair.
Step-by-Step Diagnosis: Finding the Root Cause
Accurate diagnosis is the foundation of an effective repair. Many people waste time and money fixing the wrong thing because they skipped this critical step. A systematic approach ensures you address the actual cause rather than just the visible symptom. This process is similar to how professionals approach checking sofa quality, but applied to an existing piece that has developed problems.

Careful inspection of the frame underside reveals the true extent of joint and wood damage
- Remove All Cushions and Loose Covers Take off seat cushions, back cushions, and any removable covers. This gives you unobstructed access and lets you see the bare seat platform.
- Flip the Sofa Carefully With a helper, gently tilt or flip the sofa onto its back or side onto a padded surface. Never drop or drag the sofa — this can cause additional damage to loose joints.
- Remove the Dust Cover (Cambric) The black fabric lining the underside is held by staples or tacks. Use a staple remover or flathead screwdriver to carefully remove it. This exposes the entire frame structure, springs, and webbing.
- Visually Inspect Every Joint Using a flashlight, examine each joint where frame members meet. Look for gaps, cracks, separation, missing dowels, loose screws, and failed corner blocks. Mark each problem area with painter's tape.
- Physically Test Each Joint Use your hands to gently wiggle each joint. A solid joint will not move at all. Any perceptible movement indicates failure. Pay special attention to arm-to-rail connections and cross bar joints.
- Check for Wood Damage Look for cracks running along grain lines, splits at screw holes, crushed or splintered wood at joints, and signs of wood rot or pest damage. Probe suspicious areas gently with a screwdriver tip.
- Evaluate Support Systems While the frame is exposed, inspect the spring system, webbing, and support rails. A frame repair may be pointless if the suspension is also failing.
Safety First: Wear gloves when removing staples — old staples are sharp and can cause deep cuts. Support the sofa securely when flipped to prevent it from tipping over. If you encounter mold or a strong musty smell inside the frame, ventilate the area and consider whether the sofa is worth saving before proceeding.
How to Repair Loose Frame Joints
Loose joints are by far the most common frame issue. They occur when the original glue bond fails — typically from drying out over time, exposure to moisture changes, or simply years of regular use. The good news is that loose joints with intact wood are straightforward to repair and produce excellent, long-lasting results when done correctly. If you also notice a squeaking noise when using the sofa, loose joints are very likely the cause.

Applying wood glue to a loose mortise-and-tenon joint before clamping for a solid, permanent repair
- Disassemble the Loose Joint Gently pull the joint apart. If it resists, tap lightly with a rubber mallet or the handle of a screwdriver. Remove any remaining old glue from both surfaces using a chisel, putty knife, or sandpaper. The new glue needs clean, bare wood to bond effectively.
- Inspect and Replace Damaged Dowels If the joint used dowels, remove them and check for cracking, swelling, or compression damage. Replace any compromised dowels with new hardwood dowels of the same diameter. Drill out the old dowel holes if they are enlarged or elongated.
- Apply Wood Glue Generously Coat both mating surfaces with a thin, even layer of wood glue. For dowel joints, apply glue inside the holes as well as on the dowel itself. Do not underwater the joint — a thin film on all surfaces creates the strongest bond.
- Reassemble and Clamp Push the joint back together firmly. Apply clamps across the joint and tighten until glue squeezes out slightly from the joint line. Use scrap wood blocks between the clamp jaws and the frame to prevent denting. Wipe away excess glue with a damp cloth.
- Allow Full Cure Time Leave the clamps in place for at least 24 hours for standard PVA glue, or follow the manufacturer's recommended cure time. Do not rush this step — premature clamp removal is the primary cause of joint repair failure.
- Add Reinforcement (Optional but Recommended) For high-stress joints like arm connections and front rail corners, install a corner brace or metal mending plate on the inside face after the glue cures. This belt-and-suspenders approach dramatically extends the repair's lifespan.
Pro Tip: After regluing, drill a small pilot hole through the joint and insert a 2-inch drywall screw for added mechanical strength. Counter-sink the screw head slightly below the wood surface. This combination of glue bond plus mechanical fastener creates a joint that is often stronger than the original factory assembly.
How to Fix Cracked and Broken Frame Members
Cracks in frame members are more serious than loose joints because the wood itself has lost structural integrity. Small cracks can often be repaired, but large splits, breaks, or crush damage usually require replacing the affected member entirely. The approach depends on the severity and location of the damage.

Minor Hairline Cracks
Force wood glue into the crack using a brush or syringe. Clamp the crack closed and wipe excess glue. After curing, reinforce with a wood spline — a thin strip of hardwood glued into a shallow groove cut across the crack perpendicular to the grain direction.
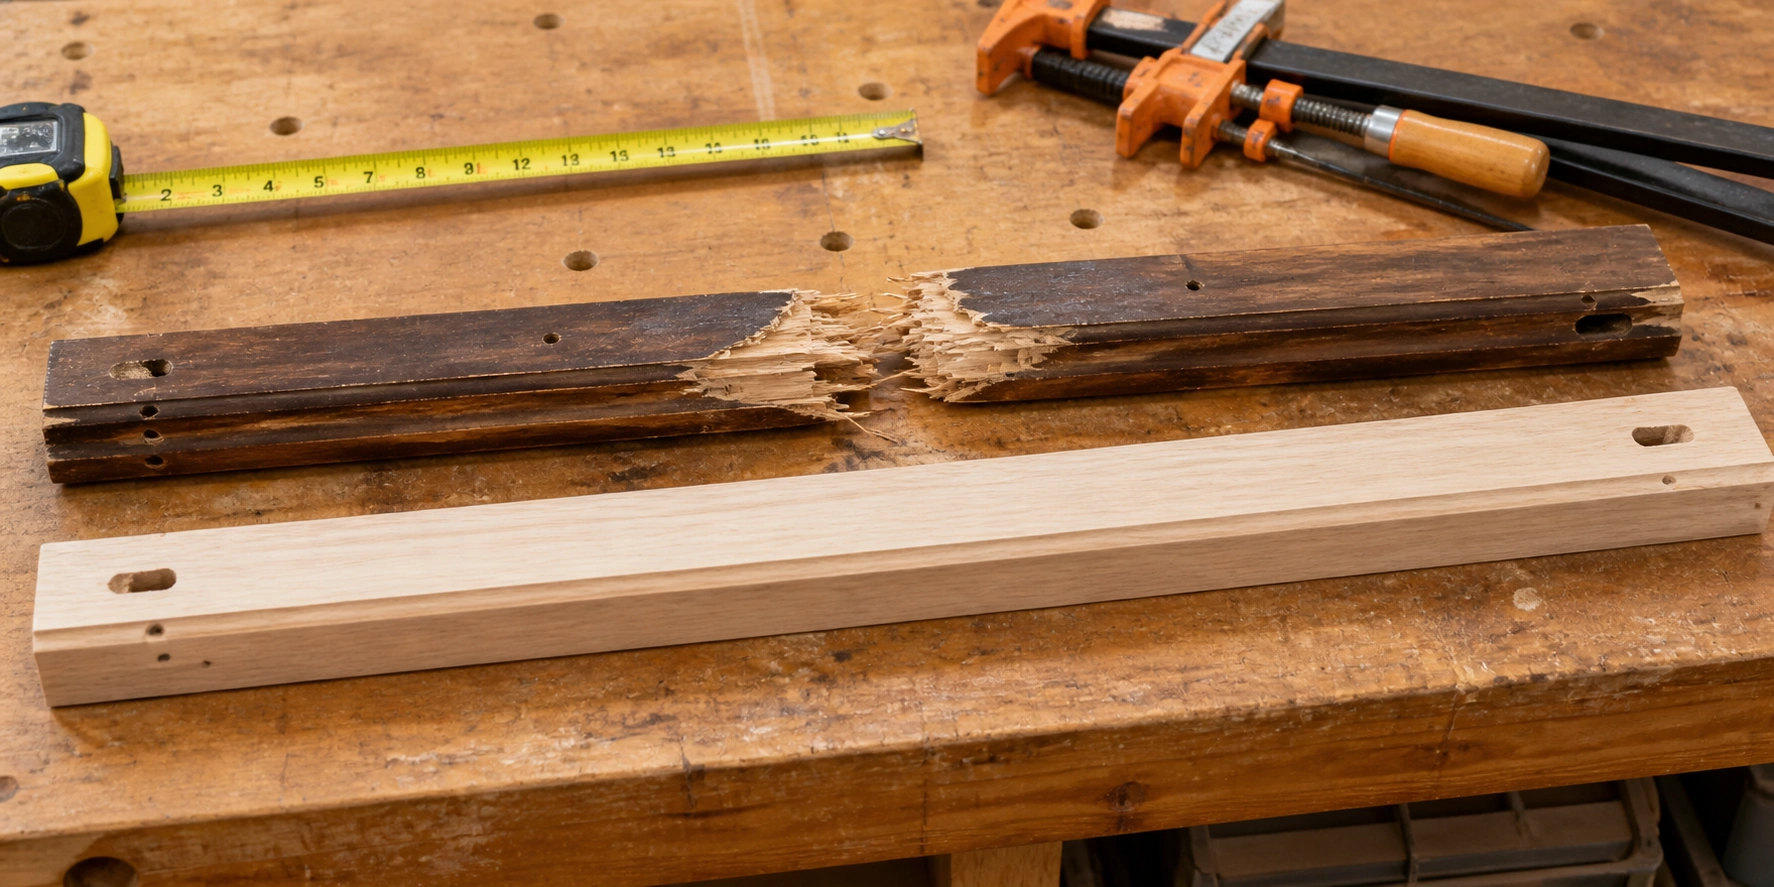
Full Breaks and Severe Splits
Do not attempt to glue a fully broken member — the repair will fail under weight. Instead, measure the damaged piece precisely, purchase matching kiln-dried hardwood, cut to size, and install the replacement using proper joinery. This is the only reliable solution for structural breaks.
When replacing a frame member, match the wood species and dimensions as closely as possible. A hardwood frame member should be replaced with the same hardwood — substituting a softer wood will create a weak point. Use the same joint type as the original: if the original used a mortise and tenon, cut matching joinery rather than simply butting the new piece and screwing it, which creates a much weaker connection.
Critical Warning: If you discover that the frame is made of particle board or MDF and has cracked or swollen, repair is generally not worthwhile. These materials do not hold screws well after damage and cannot be reglued effectively. A sofa price breakdown analysis will usually show that investing in a new sofa with a solid hardwood frame is more economical than attempting to patch a failing engineered-wood frame.
Repairing Sagging or Broken Support Rails
The support rails — particularly the front rail and side rails — bear enormous loads from the seat weight and anyone sitting on the edge of the sofa. When these rails crack or separate from their joints, the entire seat platform sags. This is one of the most noticeable frame problems because it directly affects sitting comfort. If you have already investigated the spring system and found it intact, the rails are likely the culprit.
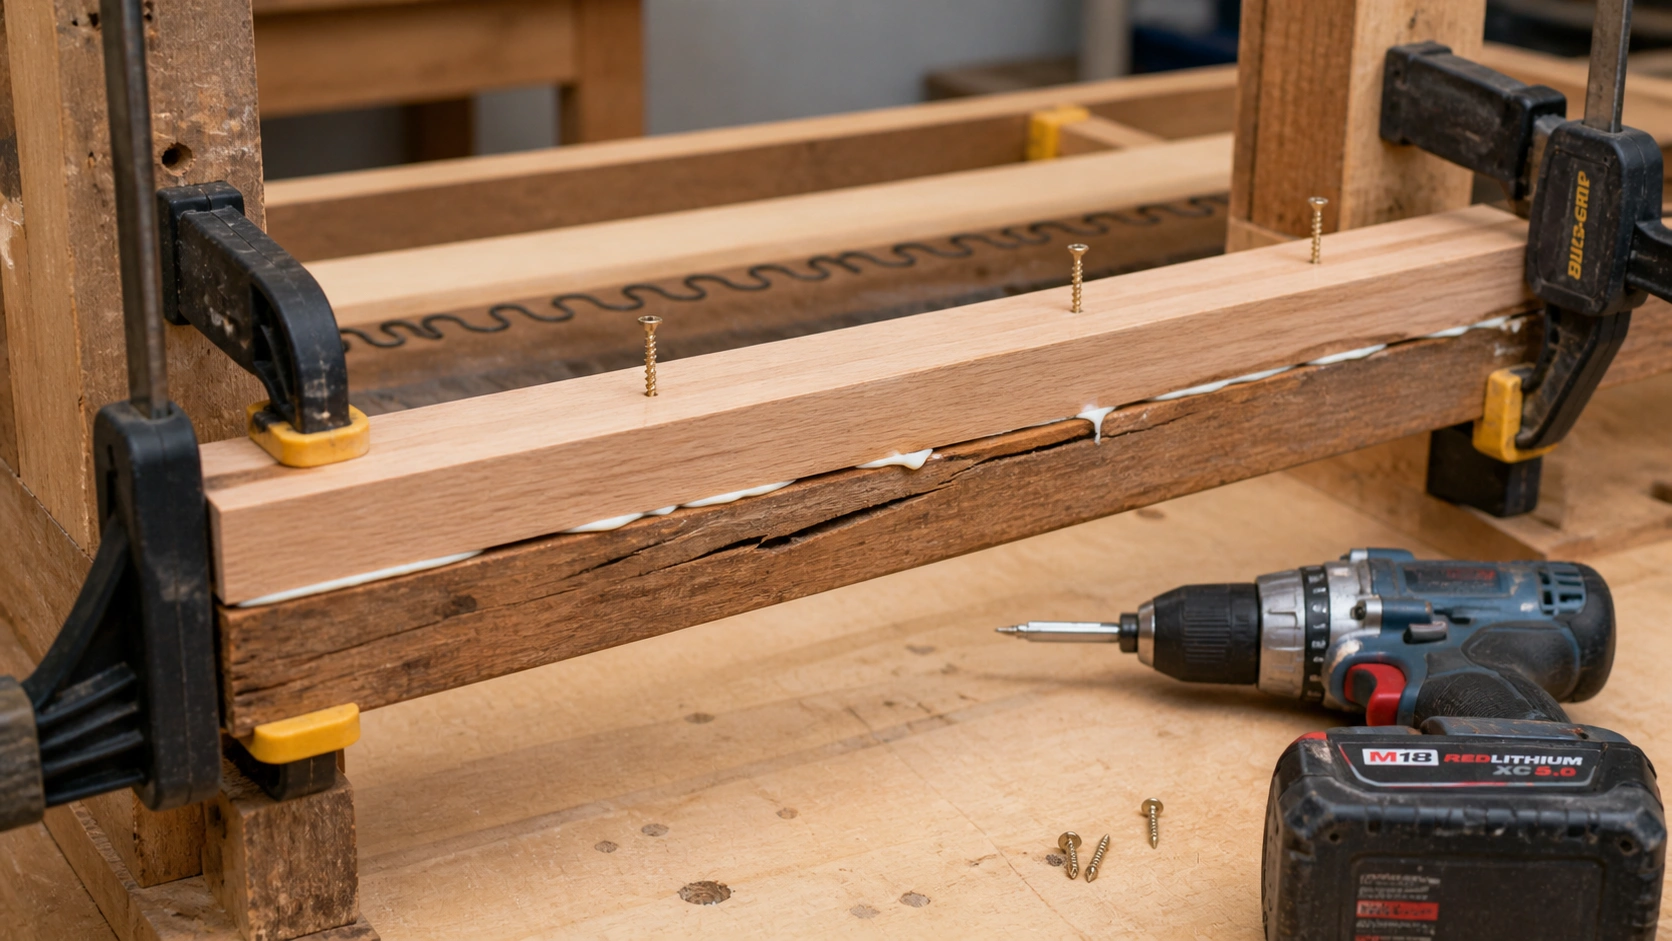
A "sister rail" technique adds a new wood member alongside the damaged rail for reinforced support
The sister rail method is an excellent repair technique for rails that have cracks but are not completely broken. This involves cutting a new hardwood rail of the same dimensions and gluing and screwing it directly alongside (or on top of) the damaged rail, effectively creating a doubled beam. The sister rail carries the load while the original rail provides alignment and additional support. This method is stronger than the original single-rail design and is particularly useful for front rails that take heavy edge-sitting stress.
For cross bar failures — the horizontal pieces connecting the side rails — replacement is usually the best approach. Cross bars are relatively simple straight pieces, making them easy to replicate. Ensure the replacement is the same length and thickness, and use dowel joints or through-bolts at each end for maximum strength. A loose sofa leg is sometimes caused by a failed cross bar rather than a problem with the leg itself, so check cross bars if leg issues persist after tightening.
Reinforcement Techniques for Long-Lasting Strength
Even after a successful repair, reinforcement is what separates a temporary fix from a permanent solution. These techniques add mechanical strength that works alongside the glue bond, ensuring the joint can withstand years of daily use. They are especially important for high-stress areas like arm connections, front rail corners, and any joint in a heavy-use sofa such as a family room sofa.
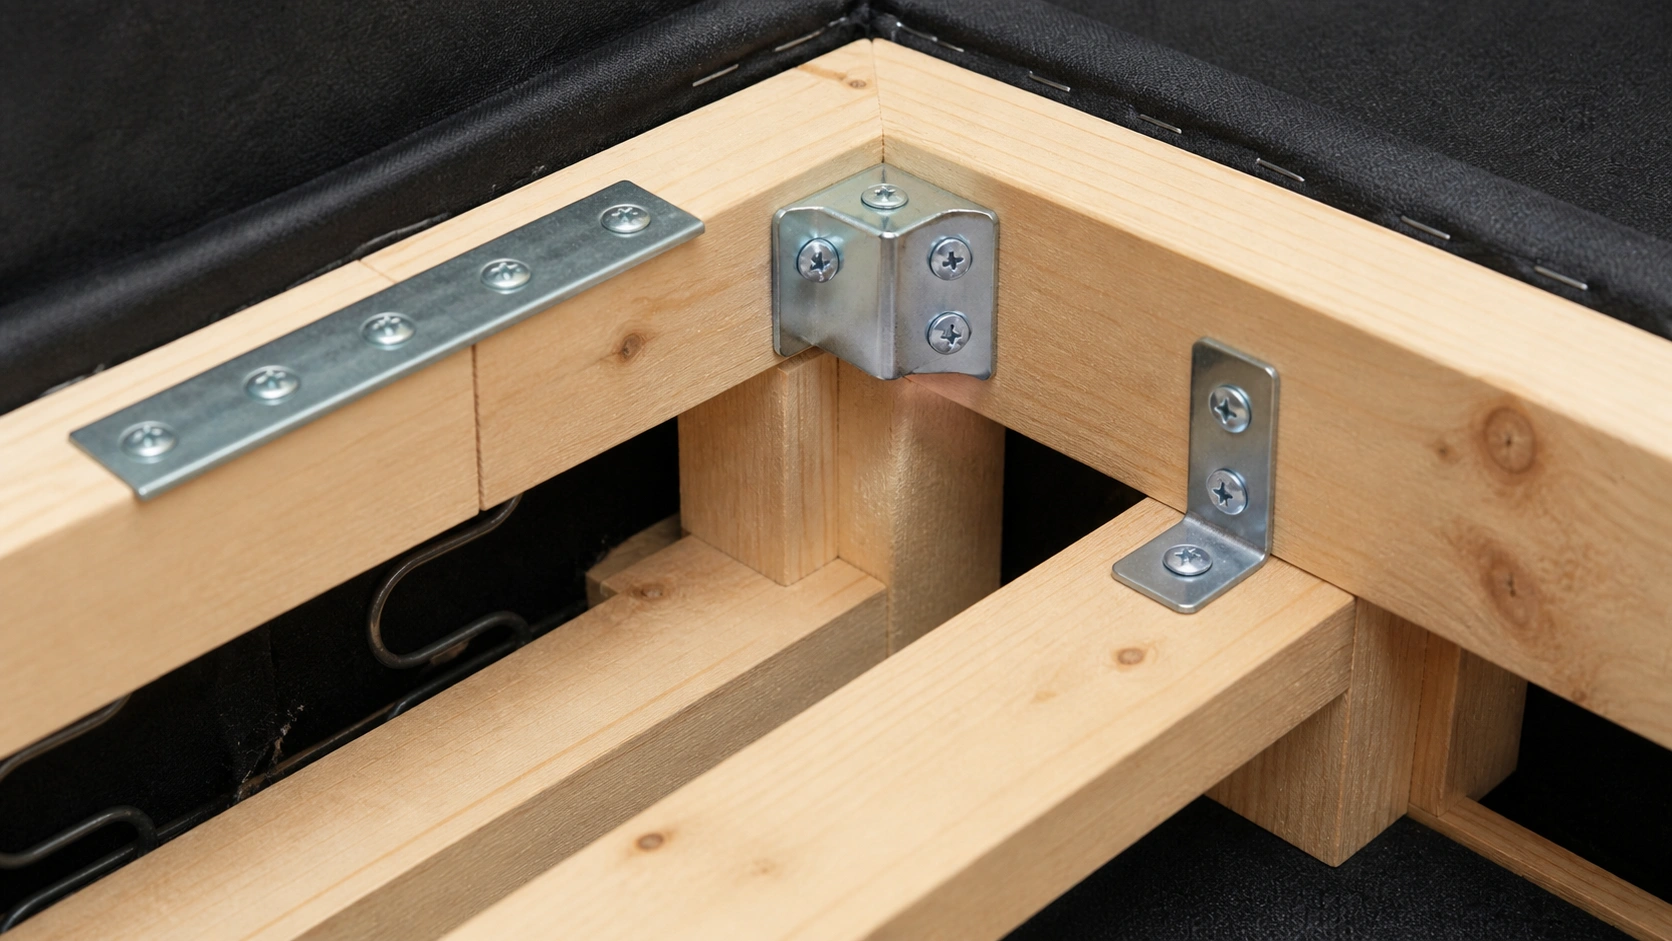
Metal corner braces and mending plates provide reliable mechanical reinforcement to repaired frame joints
Corner blocks are triangular wooden pieces that screw into the inside corners where the front rail, side rails, and back rail meet. Many factory-built sofas include these, but they are sometimes undersized or improperly installed. Upgrading to larger, thicker corner blocks made from hardwood and securing them with both glue and screws is one of the most effective reinforcement strategies available. For maximum strength, use 2-inch wood screws with pilot holes to prevent splitting.
Metal mending plates are flat steel plates with pre-drilled holes that span across a joint, securing both sides with screws. They are ideal for joints that are difficult to clamp or where access is limited. L-brackets work well at right-angle connections. Choose plates with countersunk holes so screw heads sit flush and do not interfere with reupholstering. Always drill pilot holes for screws to prevent cracking the wood.
Through-doweling is a premium reinforcement technique where a hardwood dowel is drilled completely through both pieces of a joint at a perpendicular angle. This adds a mechanical pin that prevents the joint from pulling apart regardless of glue condition. This method is commonly used on luxury sofa frames and can be added to any repaired joint for exceptional strength.
Repair vs. Replace: How to Decide
Not every sofa frame is worth saving. Making the right decision here can save you significant money and frustration. The key factors are frame material quality, extent of damage, the sofa's overall value, and the cost of repair versus replacement. Understanding the relationship between price and quality helps frame this decision objectively.
✅ Repair Is Worth It When:
- Frame is solid hardwood (oak, maple, ash, beech)
- Damage is limited to 1–2 joints or a single rail
- Original sofa was mid-range to high-end quality
- Upholstery and cushions are still in good condition
- Repair cost is less than half the replacement cost
- The sofa has sentimental value or is a matching set piece
- You can access the damaged area without major disassembly
❌ Replace Is the Better Choice When:
- Frame is particle board, MDF, or low-grade plywood
- Multiple joints are failing simultaneously
- Wood shows extensive rot, pest damage, or widespread cracking
- The sofa was inexpensive to begin with (under $500)
- Upholstery, cushions, and frame all need work
- Professional repair quotes approach replacement cost
- The sofa no longer fits your space or style needs
| Repair Type | DIY Cost Range | Professional Cost | Difficulty |
|---|---|---|---|
| Single loose joint regluing | $5–$15 (glue, clamps) | $100–$200 | Easy |
| Multiple joint repairs with reinforcement | $20–$50 (glue, clamps, braces) | $200–$400 | Medium |
| Single rail replacement | $15–$40 (hardwood, hardware) | $200–$350 | Medium |
| Major structural rebuild | $40–$100 (lumber, full hardware set) | $400–$700+ | Advanced |
| New budget sofa replacement | $300–$800 | N/A | N/A |
| New quality sofa replacement | $800–$2,500+ | N/A | N/A |
As a general rule: if you own a quality hardwood-frame sofa — whether it is a Chesterfield, a modular sofa, or a well-built traditional design — repair is almost always the smarter financial decision. These frames can last decades with proper maintenance. Conversely, if you purchased a budget sofa with a particle board frame, the money spent on repair is often better invested in a higher-quality replacement that will not develop the same problems. If you are considering buying a used sofa, our guide on secondhand vs new sofas includes frame inspection tips to help you avoid buying someone else's frame problems.
Prevention: Protecting Your Frame from Future Damage
Preventive care is far cheaper and easier than repair. Understanding what causes frame damage allows you to adopt simple habits that dramatically extend your sofa's structural life. Many of these practices also relate to overall sofa protection strategies.
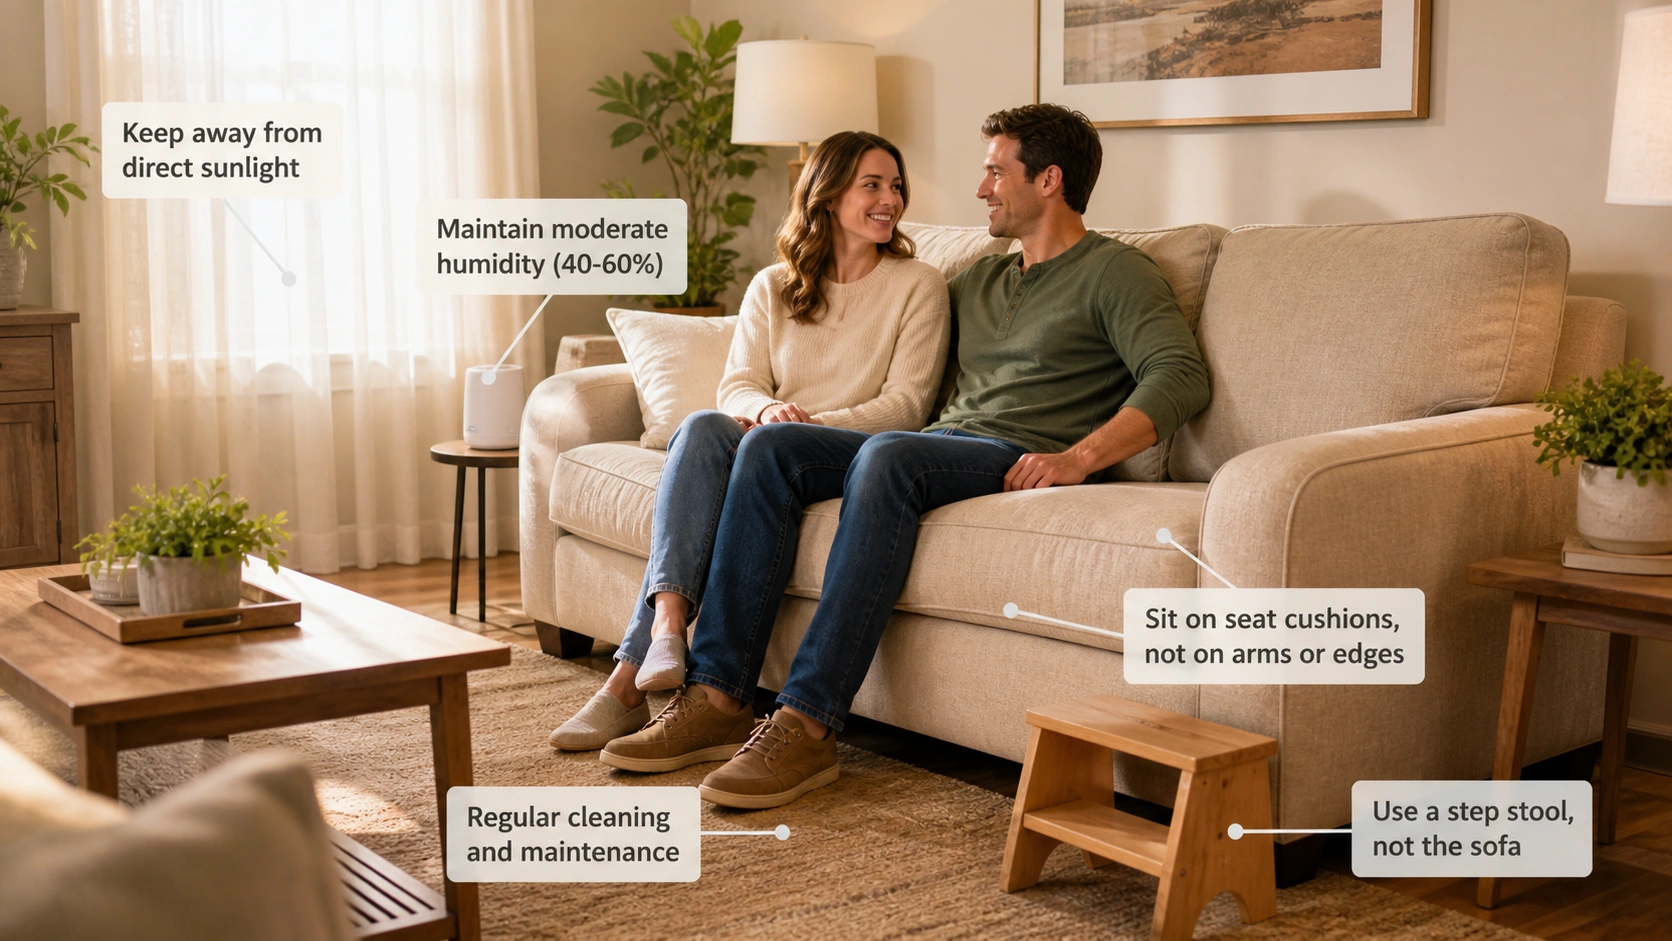
Simple daily habits and proper placement prevent the most common causes of sofa frame damage
Avoid sitting on the arms. Sofa arms are designed to support the weight of your arms and hands — not your full body weight. Sitting on arms is one of the leading causes of arm-post separation and front rail failure. This is especially important for families with children who may use arms as stepping platforms.
Do not stand on the sofa. Whether changing a lightbulb or reaching a high shelf, standing on a sofa concentrates hundreds of pounds on a few square inches of seat rail. This can crack rails instantly. Keep a step stool accessible instead.
Avoid edge sitting. Sitting on the very front edge of the seat places maximum leverage stress on the front rail-to-side-rail joints. Sit fully back on the cushion where your weight is distributed across the entire frame and support system. This is particularly important for a sleeper sofa, whose front rail may have a fold mechanism that is already a stress point.
Control humidity and moisture. Wood expands when humid and contracts when dry. Extreme or rapid moisture changes stress joints and can cause glue bonds to fail. Keep your sofa away from heating vents, air conditioners, and humidifiers that blast directly onto it. In especially dry environments, maintaining moderate indoor humidity (30–50%) helps prevent wood from drying out and joints from loosening. For sofas near windows, UV protection also helps prevent the frame from drying and weakening due to heat exposure.
Tighten hardware periodically. Leg bolts and mounting screws can loosen gradually from normal vibration and use. Every few months, flip the sofa and check that all accessible bolts and screws are snug. This 10-minute task prevents small looseness from developing into joint failure. If you notice persistent leg issues, our fix loose sofa legs guide covers leg-specific troubleshooting.
Choose wisely from the start. The single best prevention strategy is buying a sofa with a quality frame. When shopping, ask about frame construction and materials. Our guide on how to choose a sofa includes a frame quality checklist, and learning about sofa frame materials will help you understand what separates a durable frame from a disposable one. The hidden costs of buying a sofa often include early frame failure in cheap models — spending a bit more upfront on quality construction saves money for years.